Customer Portal Overview | OQUPIE
OQUPIE 📗 User Guide Customer Portal
Customer Portal Overview

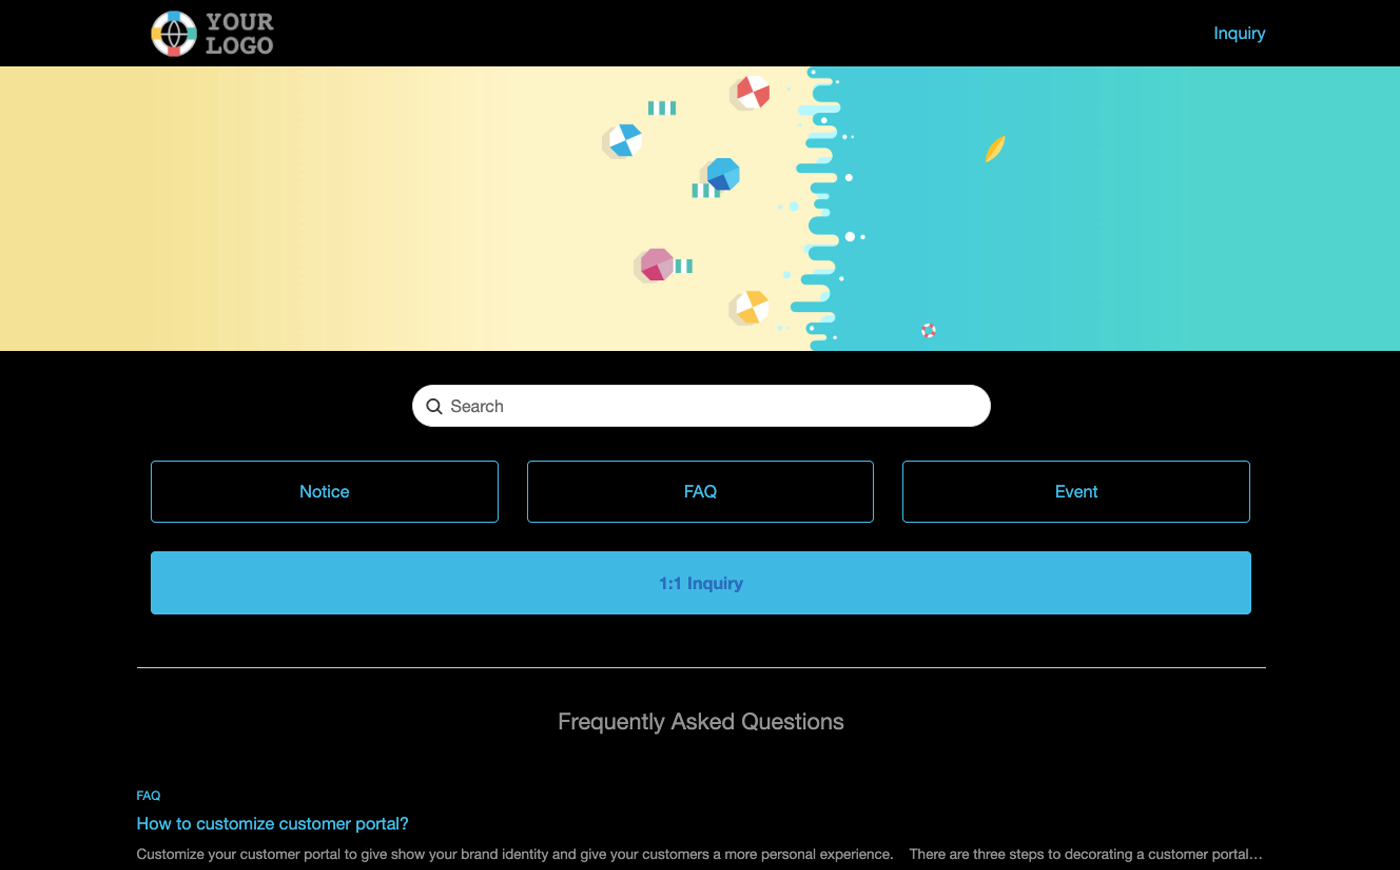
The Customer Portal is a self-service provided per brand. Open 1:1 contact through the Customer Portal and post FAQ and Notice. Customers can solve simple and repetitive problems independently, and the agent can focus on more difficult problems. 


Start Customer Portal 

To start the Customer Portal, first make the Customer Portal Contents through the Knowledge Base and set Inquiry Types to receive 1:1 inquiries from the customers. Manage Customer Portal with simple settings.

  • Make contents with the Knowledge Base
  • Make Inquiry Type and Template
  • Manage Customer Portal


Make Contents with the Knowledge Base 

Go to the Knowledge Base from the upper menu of OQUPIE. The Customer Portal Contents are made in the Knowledge Base. The Knowledge Base is managed according to the brands and can be used to make the category, folder and document. Manage policies internally and deliver brand information and news to customers. 


Category 

It is a category menu shown on the main page of Customer Portal. You can make a new category by clicking New Category on the left of the page. 

Setting Contents

  • Category Name: Category Name in use
  • Status: Public or Member
  • Description: Category description


Folder 

The Folder is a subcategory created within a category. You can create this by clicking Create New Folder on the upper left corner of the page. 

Setting Contents

  • Parent Category: Parent Category where folder will be placed
  • Folder Name: Folder in use
  • Status: Public or Member
  • Description: Folder description


Document

You can create this by clicking Create New Article on the upper left corner of the page. 

Setting Contents

  • Title and Contents
  • Status: Draft, Member, Publish
  • Location: Parent Category or Folder where document will be placed
  • Tag: Related keyword to classify documents


Status

Contents in the Knowledge Base can be managed as 3 statuses, and contents with a ‘Public’ status value are open to the Customer Portal.

  • Draft: Published only to the member that created the draft
  • Member: Published for members only (published internally)
  • Public: Published for members and customers (published in the Customer Portal)


Make Inquiry Type and Template

The Inquiry Type is grouped templates of frequently asked questions. If you set the inquiry type and template, customers can leave 1:1 Inquiries from Customer Portal, including information required to resolve the problem, and the agents can manage the tickets by inquiry type.


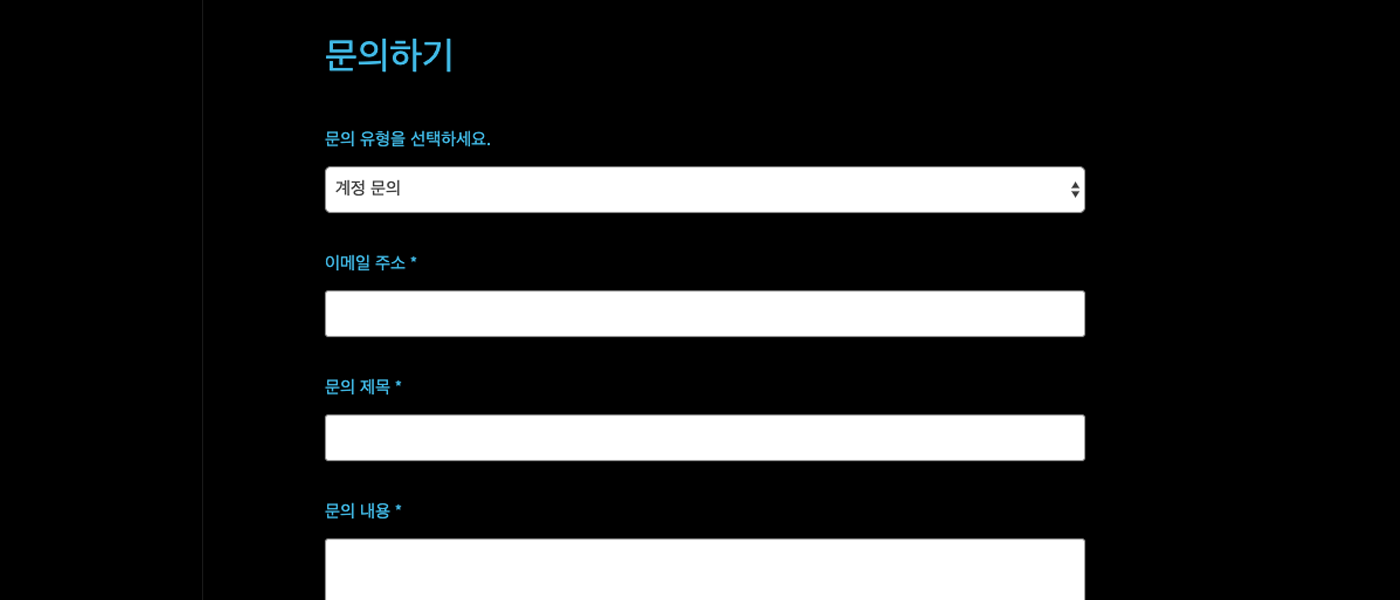
You can set the inquiry type and template in System> Brands > Choose Brand > Inquiry Type and Template


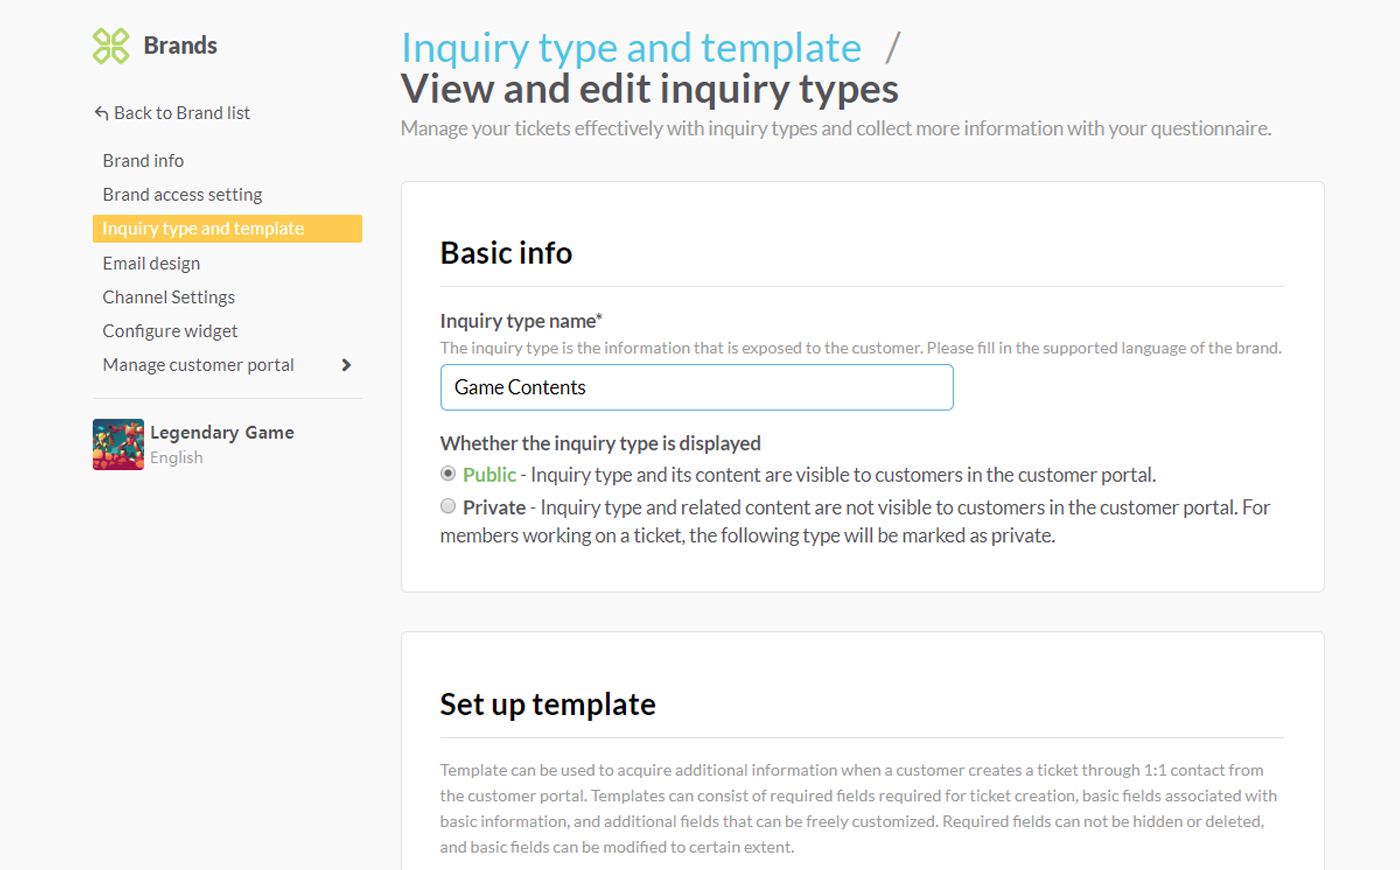
Basic components of template field are as follows.

  • Required field: Required inquiry field to create tickets
  • Basic field: Inquiry field related to basic information
  • Additional field: Inquiry field that can be created additionally


Inquiry Types that can be applied to templates are as follows.

  • Short answer type: Answer in simple sentences
  • Number short answer type: Answer in numbers
  • Multiple choice questions: Answer by selecting one from a number of choices
  • Checkbox: Answer by selecting more than one from a number of choices
  • Dropdown: Answer by choosing one value from the boxed list.


Template options are as follows.

  • Required (on/off)
  • Hide question (eye icon)
  • Delete question (trash can icon)
  • Change order


Manage Customer Portal 

When you complete the Customer Portal contents, you can set the Customer Portal in System>Brands>Choose Brand> Manage Customer Portal. Set the profile, design customization, and footer to activate the Customer Portal. 


Profile

This is where you fill out basic information on the Customer Portal. Setting contents are as follows.
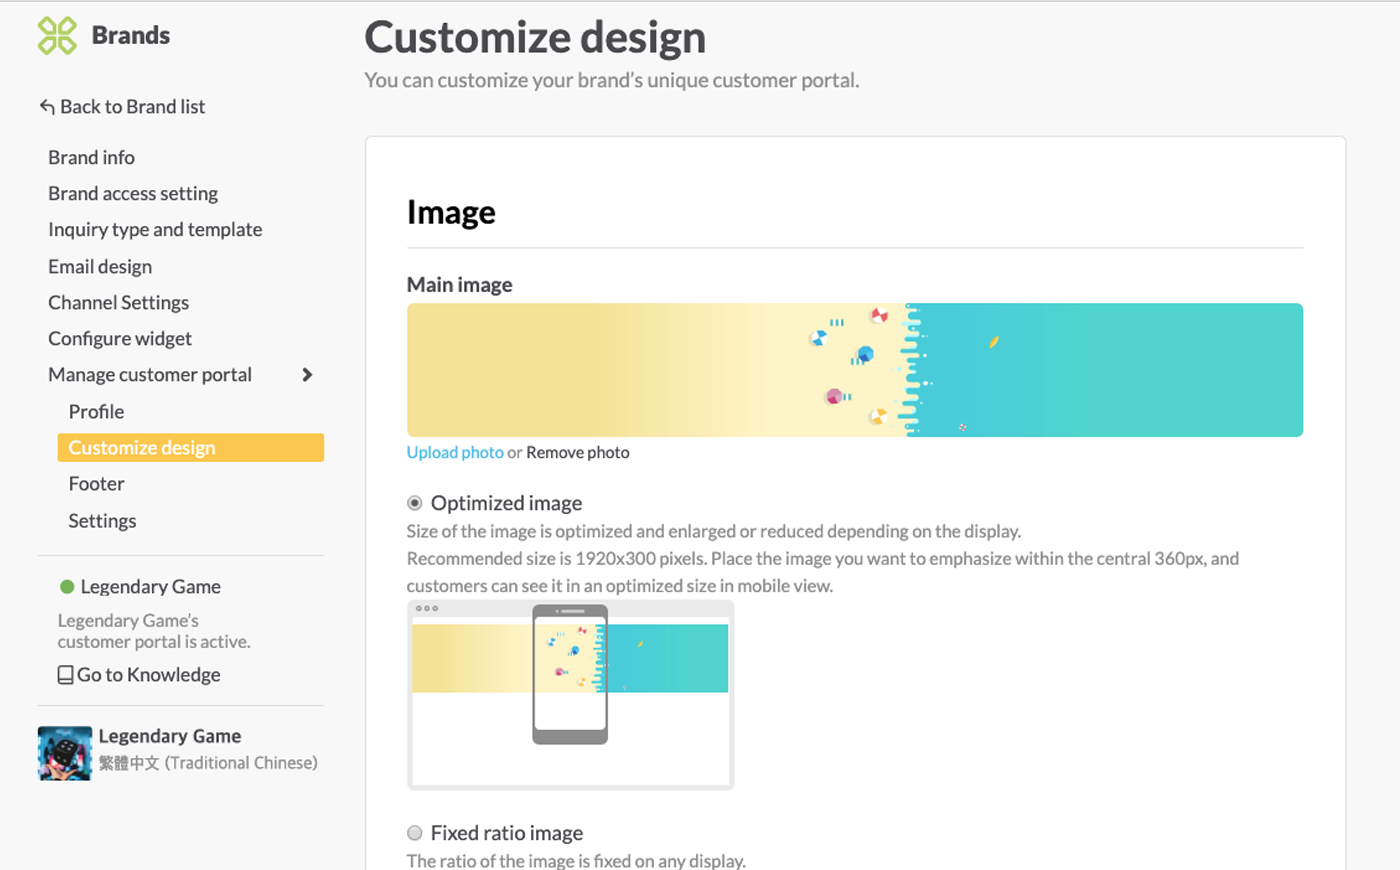
  • Customer portal name: Representative name of the Customer Portal.
  • Logo: Logo displayed at the top right of the Customer Portal.
  • Favicon: Representative icon that appears on a web browser address bar or tab.


Customize Design

Where you can custom design to display the brand's look and feel. Setting contents are as follows.
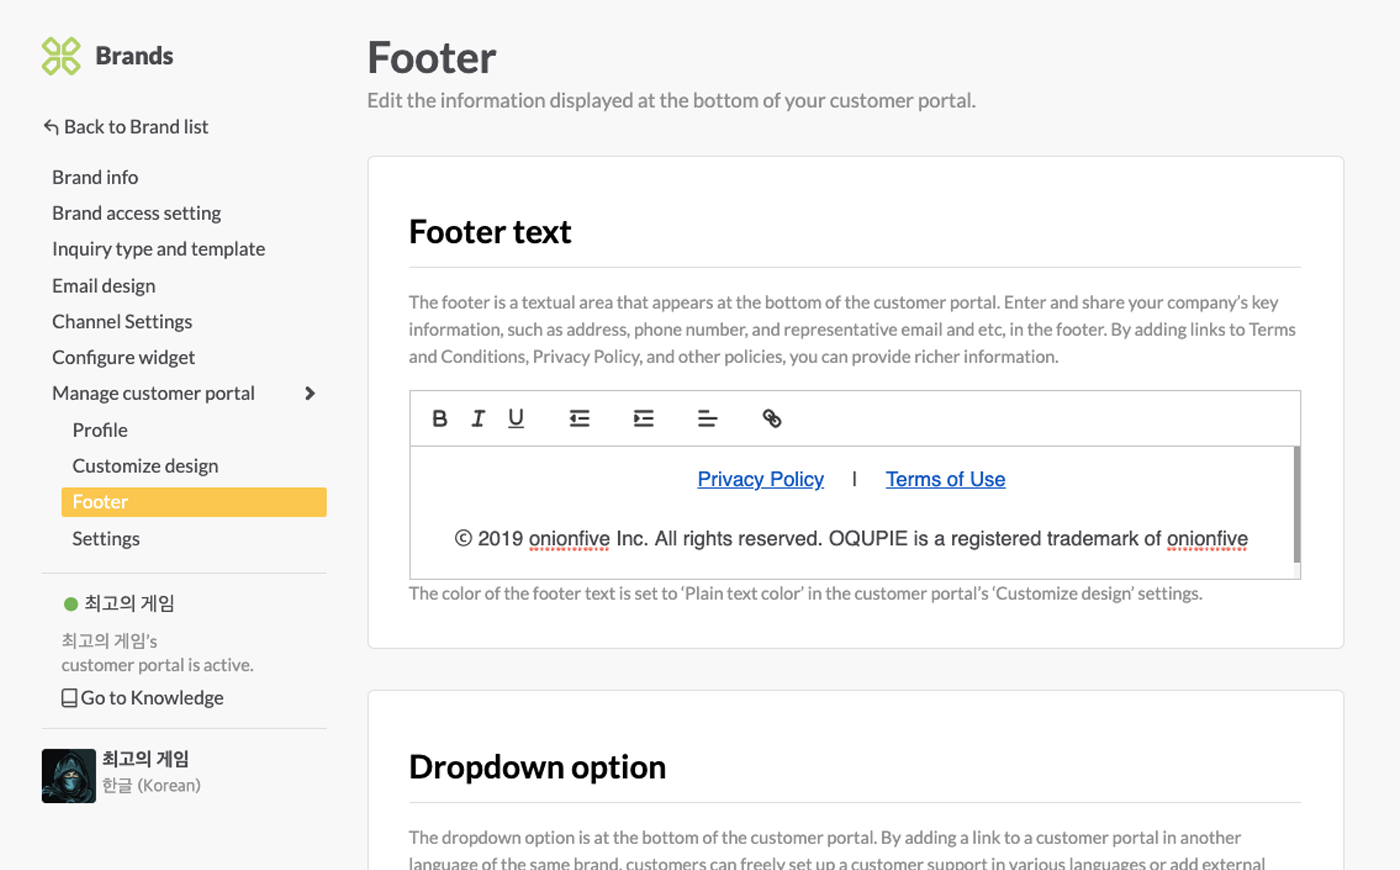
  • Image: Representative image that is displayed at the top of the main page of the Customer Portal.
  • Color: Set the color for the background, divider, button, link text, plain text in the Customer Portal. You can either use an existing theme or customize it yourself.
  • Customize button: A button that can be freely set by the user, displayed on the Customer Portal home screen. Connect with a variety of pages such as your homepage, SNS, and communities via customize buttons.


Footer

This is where you set representative information displayed at the bottom of the Customer Portal. Setting contents are as follows:
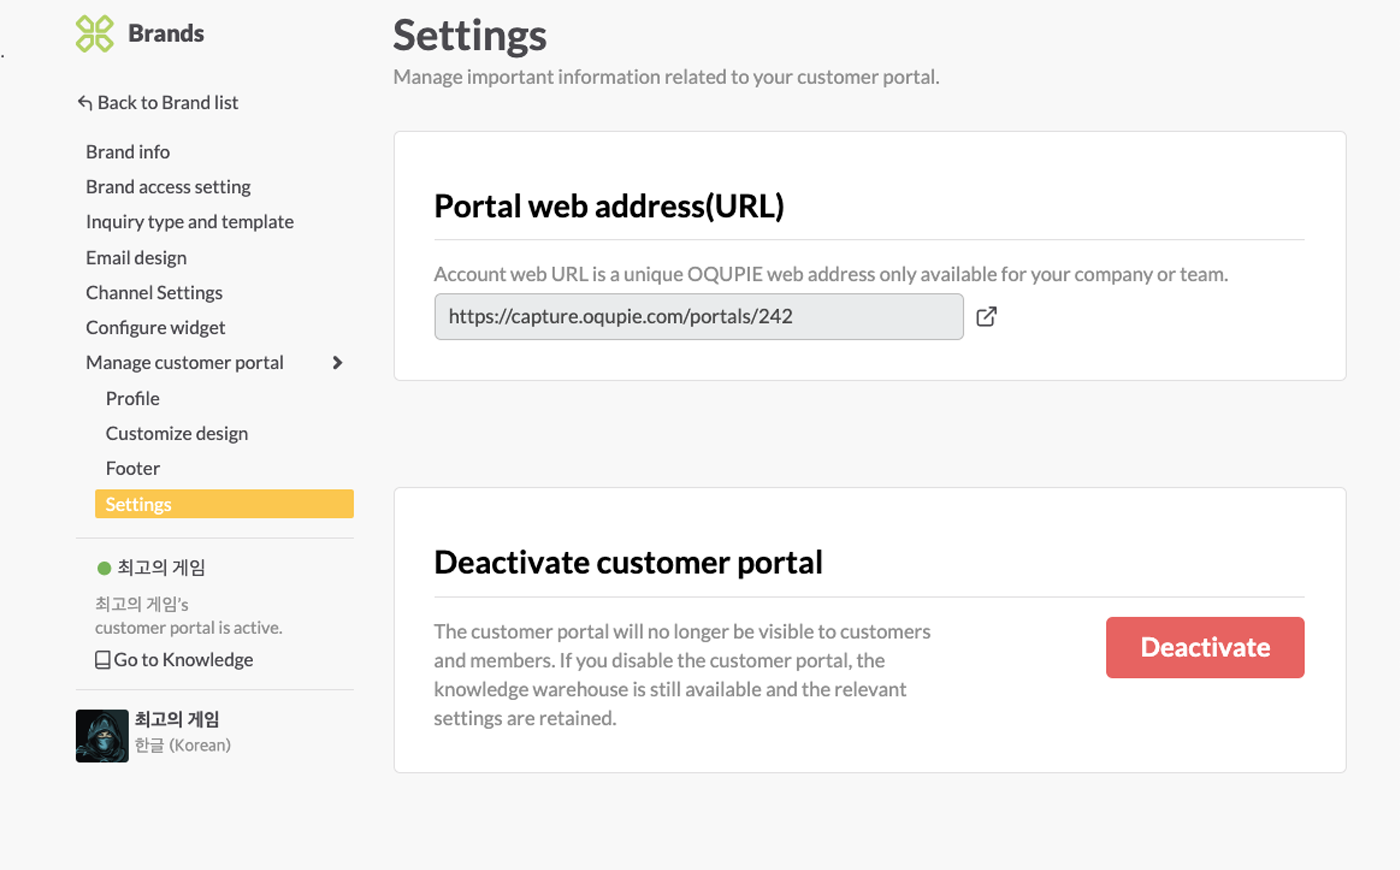
  • Footer text: Displayed at the bottom of the Customer Portal. By adding links to the company’s basic information, Terms and Conditions, Privacy Policy, and other policies, you can provide more credible information for customers.
  • Drop down option: Displayed at the bottom right of the Customer Portal. You can directly link to the desired website with General options or can link to other Customer Portals created in OQUPIE with Customer Portal Connection options.


Setting

This is where you can set customer activation/inactivation and check the URL of the Customer Portal web address.

Related Articles Related Articles